There’s a specific kind of heartbreak that happens in a Land Cruiser at 6:15am. A leopard shifts its weight on a sausage tree branch, the light turns that impossible gold, and you fumble with a lens that simply can’t reach far enough. The moment passes. The leopard settles back into shadow. You got nothing but a blurry green smudge with a vague cat-shaped blob in it.
This guide exists so that doesn’t happen to you. No jargon, no camera-store upsell, just the gear that actually earns its space in your bag on a real game drive.
- Reach and autofocus speed matter far more than megapixel count on safari, since animals are usually 20 to 80 meters away, not posing for portraits.
- A 100-400mm or 150-600mm zoom covers roughly 90% of safari situations, from lion sightings to elephant herds crossing a river.
- You don’t need two camera bodies to get great shots, but avoiding lens changes in dusty vehicles is a real advantage if your budget allows it.
- Shutter speed matters more than the price tag on your camera: 1/1000s for general wildlife, 1/2000s or faster for birds in flight.
- A rocket blower, a rain cover, and a padded bag will save more shots than any expensive upgrade ever will.
Why Safari Photography Gear Differs
Safari photography is a different discipline from ordinary travel photography because the subject rarely lets you get close, rarely holds still, and is usually at its most active in the lowest light of the day. That combination of distance, movement, and dim golden-hour light is what separates a phone camera or a standard wide-angle travel kit from gear built to actually deliver on a game drive.
Think about the gear you’d pack for a city trip or a beach holiday. Wide lenses for architecture, a compact body for convenience, maybe a phone doing 80% of the work. On safari, none of that gets you the shot. A lion resting under a acacia tree at 40 meters isn’t going to walk over and pose. An elephant herd crossing the Mara River is moving fast and unpredictably. A martial eagle lifting off a dead tree branch gives you perhaps half a second of warning.
This is why reach (the focal length of your lens) and speed (both shutter speed and autofocus tracking) matter enormously more than megapixels or a flagship camera body. A cheap, competent zoom lens with fast autofocus will out-perform a top-of-the-line camera body paired with a lens that can’t reach the animal. Guides will tell you the same thing: it’s not the camera, it’s the glass.
And then there’s the emotional stakes of it. You’ve flown halfway across the world, spent days planning your ideal trip duration, and the split second a lion lifts its head to look directly at you is not a moment you get back. Good gear, set up correctly before you even leave the lodge, is what turns that into a photograph you’ll frame instead of a story you tell with regret in your voice.
Camera Gear by Budget Level
There’s no single “correct” safari kit. What matters is matching your gear to how seriously you shoot and how much weight and complexity you’re willing to manage in a moving vehicle. Here’s a realistic breakdown by tier.
| Budget Tier | Recommended Gear | Best For |
|---|---|---|
| Entry-level | One mirrorless or DSLR body, 100-400mm zoom lens, lens cloth, basic rain cover | First-time safari travelers who want quality photos without carrying a second bag of gear |
| Mid-range | Body with improved autofocus tracking, 100-500mm or 150-600mm lens, monopod for support | Enthusiasts who’ve done one safari already and know they’ll shoot seriously this time |
| Enthusiast | Two camera bodies, telephoto zoom (150-600mm) plus a 24-105mm, optional 1.4x teleconverter | Travelers doing multi-country trips or repeat safaris who don’t want to miss wide shots while zoomed in |
| Pro-level | 400mm or 600mm prime lens, dual high-burst mirrorless bodies, 1.4x teleconverter, backup batteries and cards | Serious photographers building a portfolio, or those chasing specific behavior shots like hunts or bird strikes |
Notice what doesn’t change much across tiers: the core need is a telephoto zoom. What changes is redundancy (a second body), reach (a longer prime lens), and speed (better autofocus for tracking a running cheetah or a bee-eater snapping insects mid-air).
If you’re still deciding on the broader shape of your trip, whether that’s a private vs group safari, it’s worth knowing that private vehicles generally give you more room to maneuver for photography, more flexibility to reposition for light, and fewer elbows in your way when the lens comes out.
Best Lenses for Safari Wildlife
If there’s one piece of gear worth obsessing over, it’s the lens. Camera bodies get replaced every few years; a good telephoto zoom will serve you across a decade of safaris. Here’s how the common focal ranges actually perform in the field.
100-400mm
The sweet spot for most first-time safari travelers. Light enough to hand-hold for hours, versatile enough to capture a lion at 30 meters and still pull back for a wider herd shot. This is the lens that shows up in more safari bags than any other, and for good reason.
100-500mm
A step up in reach without a dramatic jump in weight. Useful when your guide can’t always get the vehicle as close as you’d like, which happens often in national parks with strict off-road driving rules, as opposed to private conservancies where vehicles can leave the track.
150-600mm
The workhorse for bird photography and distant sightings. Heavier, and it demands faster shutter speeds to avoid camera shake, but the extra reach pays off when you’re photographing a fish eagle across a lagoon in the Okavango Delta or a leopard resting deep in riverine bush.
200-600mm
Similar territory to the 150-600mm but often with better optical performance at the long end. Worth considering if bird-in-flight photography is your priority, particularly for destinations known for prolific birdlife.
400mm or 600mm prime lenses
These are for photographers who know exactly what they want: maximum sharpness, wide apertures for low light, and the willingness to carry a heavier, more expensive piece of glass. A 600mm prime with a 1.4x teleconverter is the choice serious wildlife photographers make when chasing specific shots, like a leopard’s eyes in the last light of day.
24-105mm and 70-200mm as companions
Don’t leave these at home. When a herd of elephants surrounds your vehicle, or you’re photographing the sweeping gold of the Serengeti plains at sunrise, your telephoto becomes useless. A mid-range zoom handles environmental portraits and landscapes; a 70-200mm bridges the gap between wide shots and full telephoto reach.
The wide-angle misconception
Many first-time safari travelers pack the same wide-angle lens they used in European cities, assuming it’ll do double duty. It won’t. Wildlife on safari is rarely close enough for a 24mm or 35mm lens to render more than a distant speck. Save the wide-angle for camp scenery, night skies, and those rare moments when animals do approach the vehicle closely, like curious elephants or habituated lions in certain conservancies.
The scenario matters too. Big cats resting near a vehicle need less reach than birds in flight, which need less reach than a leopard photographed from a boat on a delta channel. Know your likely destination and plan the lens accordingly. If you’re comparing Serengeti versus Maasai Mara for the Great Migration, know that river-crossing photography especially rewards a longer lens, since the best crossing points often put you at a respectful distance from the chaos.
One Camera Body or Two
Should you bring one camera body or two on safari? One body is entirely sufficient for most travelers, especially first-timers who are still learning their gear. Two bodies become valuable once you’re shooting seriously enough that missing a wide shot while zoomed in on a lion’s face actually bothers you.
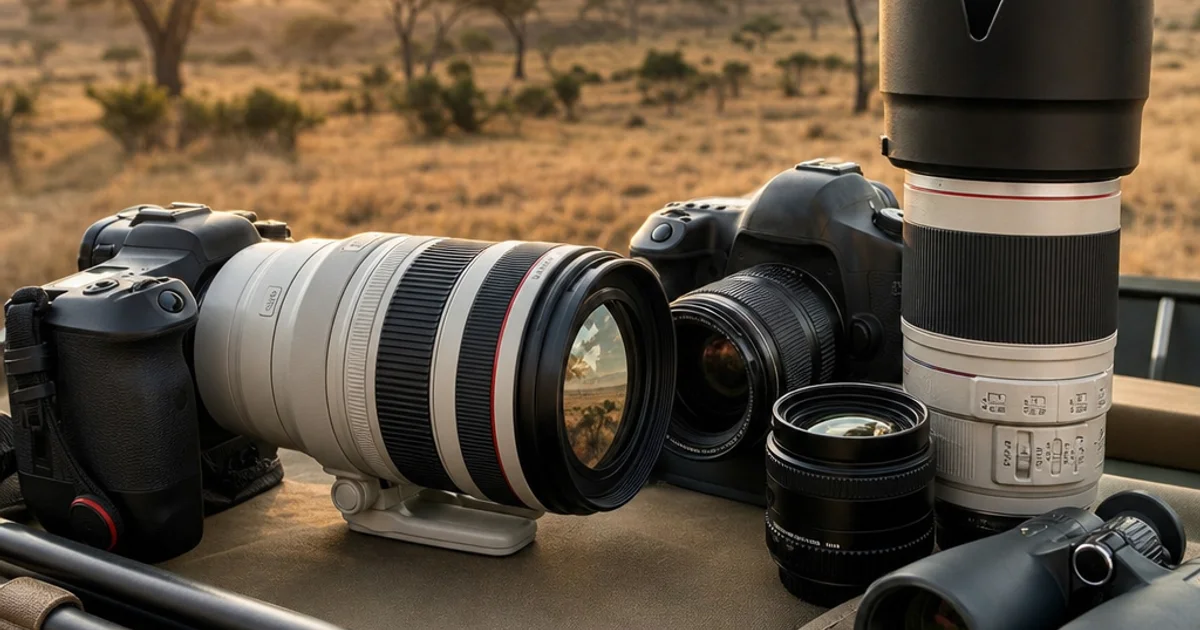
The case for two bodies isn’t about redundancy or luxury. It’s practical. Safari vehicles are dusty, and changing lenses mid-drive means dust getting onto your sensor at exactly the moment a cheetah starts sprinting. Photographers who bring two bodies typically keep a telephoto mounted on one and a mid-range zoom or wide-angle on the other, swapping bodies instead of lenses. That’s the entire advantage: speed and cleanliness, not bragging rights.
For everyone else, a single body is genuinely fine. Budget travelers, casual shooters, and anyone prioritizing travel-light logistics over portfolio-building should not feel pressured into buying a second camera. The animals don’t know or care what body count you brought.
Settings that matter more than gear
Here’s what actually separates a good safari photo from a missed one, and it has nothing to do with how much you spent:
- Aperture Priority mode lets you control depth of field while the camera handles shutter speed, ideal for beginners who don’t want to fumble with full manual settings while a cheetah accelerates.
- Manual mode with Auto ISO gives more experienced shooters control over both aperture and shutter speed while the camera compensates for changing light, useful during the fast-shifting light of golden hour.
- Animal Eye Detection autofocus, now standard on most modern mirrorless systems, tracks an animal’s eye automatically and dramatically increases your keeper rate, especially for moving subjects.
Shutter speed guidance
As a baseline, aim for 1/1000s for general wildlife photography, enough to freeze a walking lion or a grazing zebra without motion blur. For birds in flight or anything moving fast, like a cheetah mid-chase, push to 1/2000s or faster. Slower shutter speeds work for stationary subjects in good light, but wildlife rarely stays stationary for long.
The biggest misconception new safari photographers carry is that an expensive body will save an otherwise sloppy setup. It won’t. A modest camera in Aperture Priority mode with the right shutter speed will consistently outperform a premium body left in default settings. Know your camera before you land in Africa, not during your first game drive.
Protecting Gear From Dust and Weather
Safari environments are hard on camera gear in ways that catch first-timers off guard. Dust gets everywhere, roads are unpaved, and East Africa’s rainy seasons can turn a clear morning into a downpour within twenty minutes.
- Rocket blower: A cheap, simple tool that should be used daily to clear dust from your lens and camera body before it works its way into moving parts. Never use compressed air canisters near a sensor, the pressure is too aggressive.
- Lens cloths: Keep two or three microfiber cloths on hand. Fine Kalahari or Serengeti dust settles fast, and a smudged front element ruins otherwise perfect shots.
- Rain covers: Especially relevant if you’re traveling during East Africa’s rainy seasons or the Okavango Delta’s wetter months. A simple rain sleeve costs little and prevents catastrophic damage during a sudden downpour mid-game-drive.
- Dry bags or dust-proof camera bags: Useful for overland transfers and boat transfers in the Delta, where splashes and dust are both real risks.
- Spare batteries: Cold mornings on open vehicles drain batteries faster than expected. Carry at least one spare, charged the night before every game drive.
Weather and terrain vary significantly by destination and season, so it’s worth checking the best time to visit guide for each safari country before you finalize what protective gear to pack. A dry-season trip to Kenya calls for different precautions than a green-season visit to Botswana.
Beyond the camera bag itself, general packing logistics matter too. If you haven’t finalized your full kit list yet, the complete safari packing checklist covers everything from clothing layers to the practical extras that keep camera gear functioning smoothly across dusty, hot, and occasionally wet conditions.
Bringing It All Together
The right safari camera kit isn’t about buying the most expensive gear you can afford. It’s about matching your equipment to the specific challenges of the environment: distance, movement, and fast-changing light. A 100-400mm lens and a single competent body will get a first-timer stunning images in Kenya or Tanzania. A dual-body setup with a longer prime lens rewards someone chasing specific behavior shots in the Okavango Delta or during a Mara river crossing.
Know your destination, know your budget, and above all, know your camera’s settings before that leopard shifts in the tree. The gear only matters if you’re ready when the moment happens.
Frequently Asked Questions
What’s the most important piece of camera gear to bring on safari?
The telephoto zoom lens matters far more than the camera body itself. A 100-400mm or 150-600mm lens covers roughly 90% of safari situations, since animals are typically 20 to 80 meters away and won’t come closer for a portrait. Guides often say it plainly: it’s not the camera, it’s the glass.
Do I need an expensive camera body for good safari photos?
No, a cheap but competent zoom lens with fast autofocus will outperform a flagship camera body paired with a lens that can’t reach the animal. Reach and autofocus speed matter far more than megapixel count on safari. What actually changes across budget tiers is redundancy, extra reach, and autofocus speed, not the core need for a telephoto zoom.
Should I bring two camera bodies on safari?
You don’t strictly need two bodies to get great shots, but it does help you avoid changing lenses inside a dusty vehicle, which is a real risk to your gear. Two bodies also let you keep a wide lens ready while staying zoomed in with a telephoto, useful for travelers doing multi-country trips or repeat safaris. This setup is recommended mainly at the enthusiast and pro-level tiers.
What shutter speed should I use for wildlife photography?
Use at least 1/1000s for general wildlife shots to freeze movement from animals like lions, elephants, or cheetahs. For fast action like birds in flight, bump that up to 1/2000s or faster. Shutter speed matters more for a sharp shot than how much your camera body cost.
Why is safari photography different from regular travel photography?
Safari subjects rarely let you get close, rarely hold still, and are often most active during the lowest light of the day, at dawn or dusk. This combination of distance, movement, and dim golden-hour light means wide lenses and compact travel cameras that work fine for cities or beaches simply won’t deliver on a game drive. That’s why reach and autofocus tracking speed become essential rather than optional.
What basic accessories should I pack alongside my camera and lens?
A rocket blower for dust, a rain cover, and a padded bag are simple items that save far more shots than any expensive gear upgrade. A monopod is also worth adding at the mid-range tier for extra support during long lens use. At the pro level, backup batteries and memory cards become essential since you won’t have easy access to charging or shops mid-drive.
What camera setup is best for a first-time safari traveler on a budget?
An entry-level kit works well: one mirrorless or DSLR body, a 100-400mm zoom lens, a lens cloth, and a basic rain cover. This setup is designed for first-time safari travelers who want quality photos without carrying a second bag of gear. It covers the vast majority of sightings without the added weight and complexity of a multi-body, multi-lens system.